File Storage Service
The platform uses MIN.io as File Storage server. This allows for static content uploading functionality without necessarily exposing a specific port or FTP / SFTP service.

In particular, MIN.io works as an object storage and is compatible with AWS S3 API. This service can be accessed via the following link: https://console.fs.i3lab.group
Developer
As a developer, you can use the MIN.io File Storage to store log and static files (images, video, audio). In order to use it, you need the following information:
- URL of the MIN.io service - In our case it is https://console.fs.i3lab.group
- Access Key - Provided by admin
- Secret Key - Provided by admin
Instantiate
Initially, it is necessary to instantiate the object that will allow us to connect with the remote bucket. To do this, you can simply:
import * as minio from 'minio'

const minioClient = new minio.Client({
    endPoint: 'fs.i3lab.group',
    port: 443,
    useSSL: true,
    accessKey: process.env.MINIO_ACCESS_KEY,
    secretKey: process.env.MINIO_SECRET_KEY
})
ENV Variables
Developers must avoid hard-coding information within code. Login credentials must be taken through environment variables.
Upload to file
Here is an example of a function implementation that takes a blob of data and saves it on storage:
In this case, the buffer was taken through multer
export const uploadFileToBucket = async (bucketName, objectName, buffer) => {
    minioClient.putObject (
        bucketName,
        `/path/example/${objectName}`,
        buffer,
        function (err, objInfo) {
            if (err) {
                return console.log (err) // err should be null
            }
            console.log ('Success', objInfo)
        }
    )
}
Having this function available, it is sufficient to call it to save the file in the selected bucket
Read a file
To read a file, a the same endpoint is used. For example, if a file is uploaded to the example bucket at path images/IMG_01.png, to be able to GET correctly, you need to call the url https://fs.i3lab.group/example/images/IMG_01.png. To get the data from the command line, you can use the curl utility as follows:
curl https://fs.i3lab.group/example/images/IMG_01.png
Admin
Register new user
To be able to upload files into the storage, you need to be authenticated. To register a new user, you need to log in as an administrator.
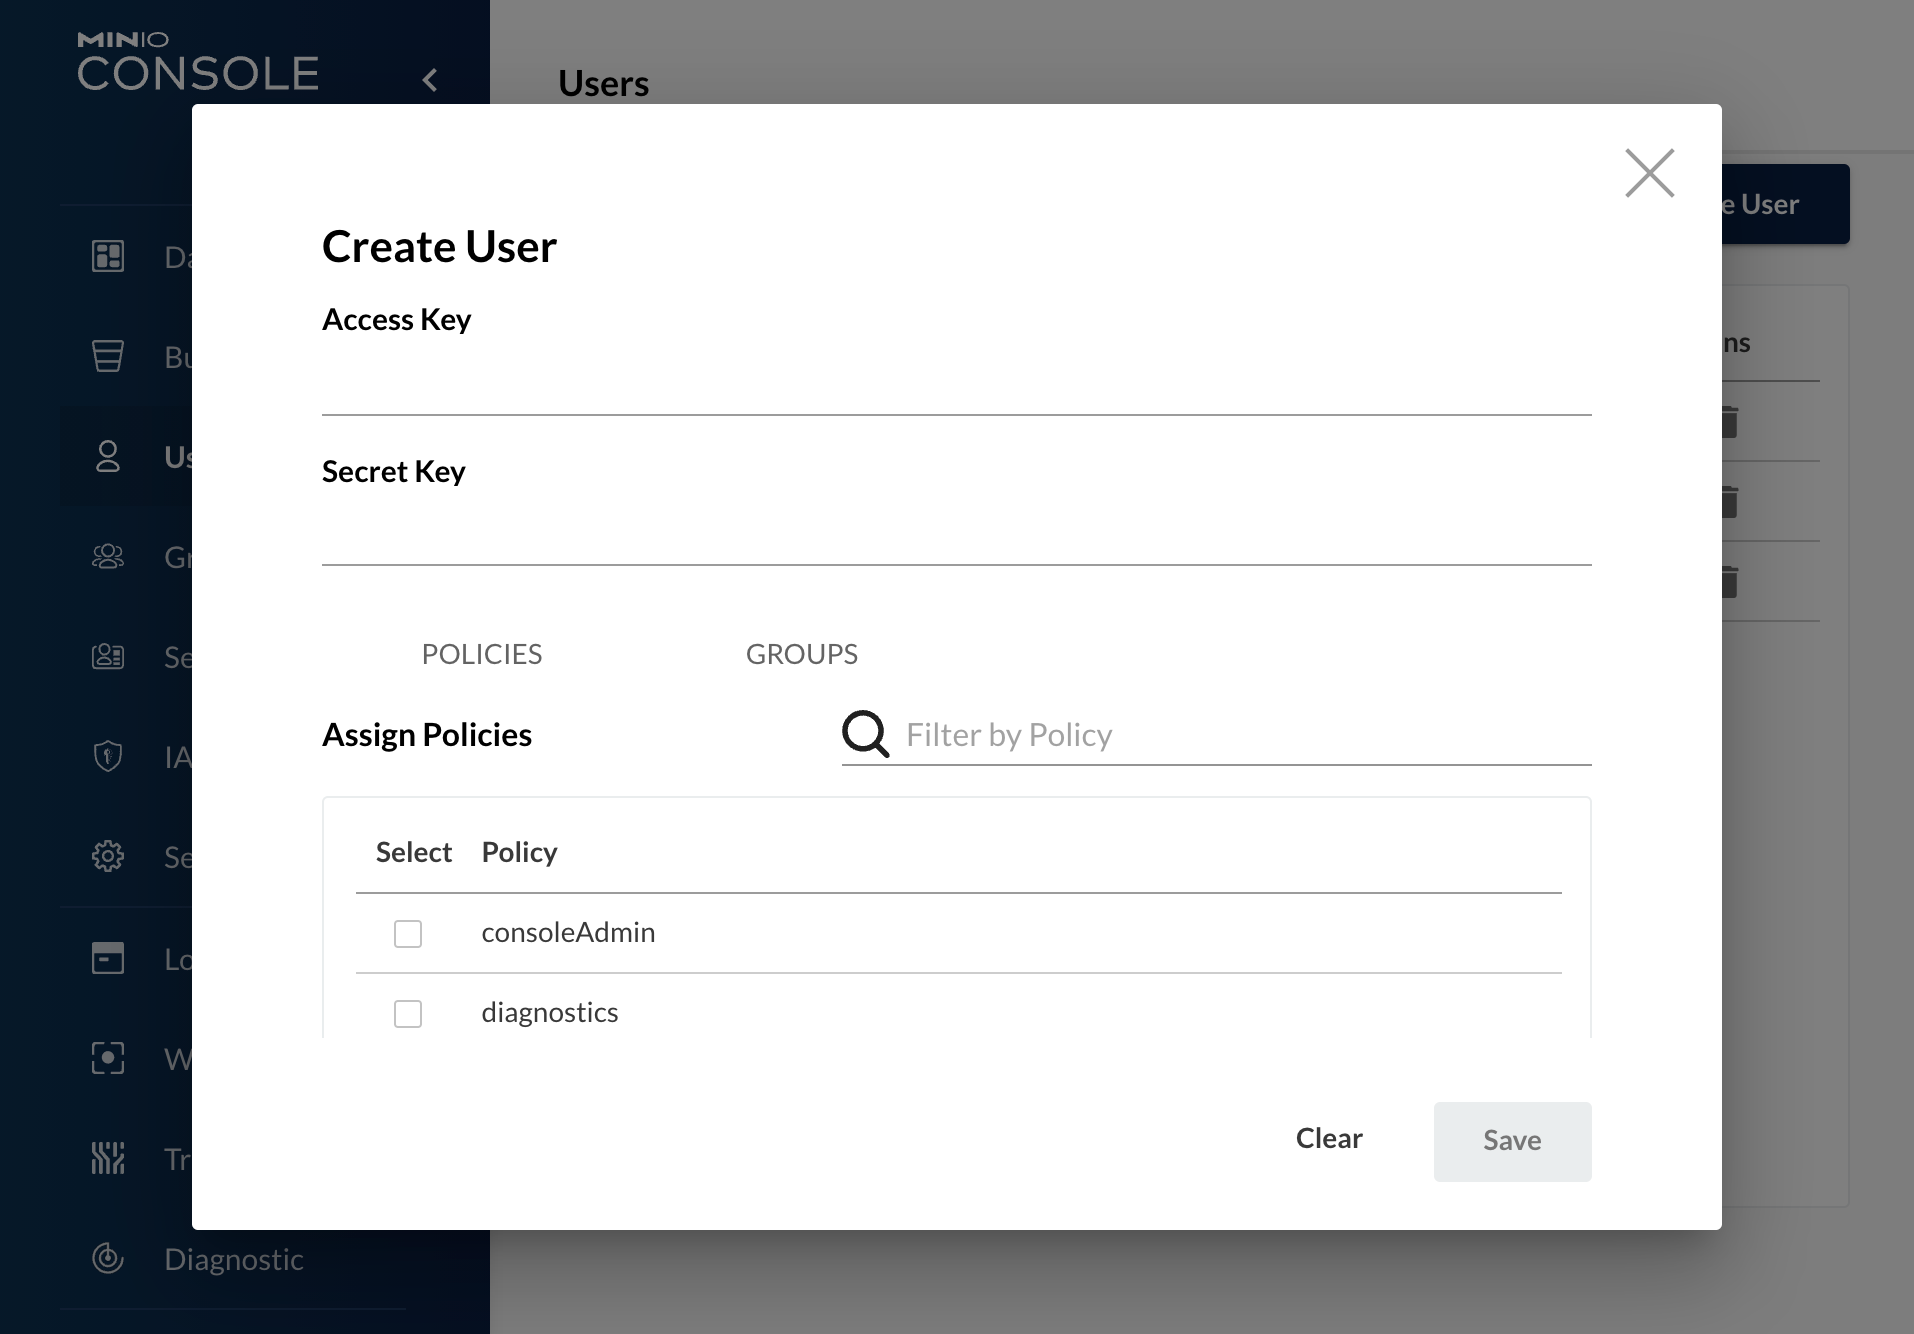
Warning
Although it is possible, it is HIGHLY recommended NOT TO assign a specific policy to a single user. This is because it is difficult to keep track of specific permissions.
It is recommended to create groups,instead, assign policies to them, and add users to them.
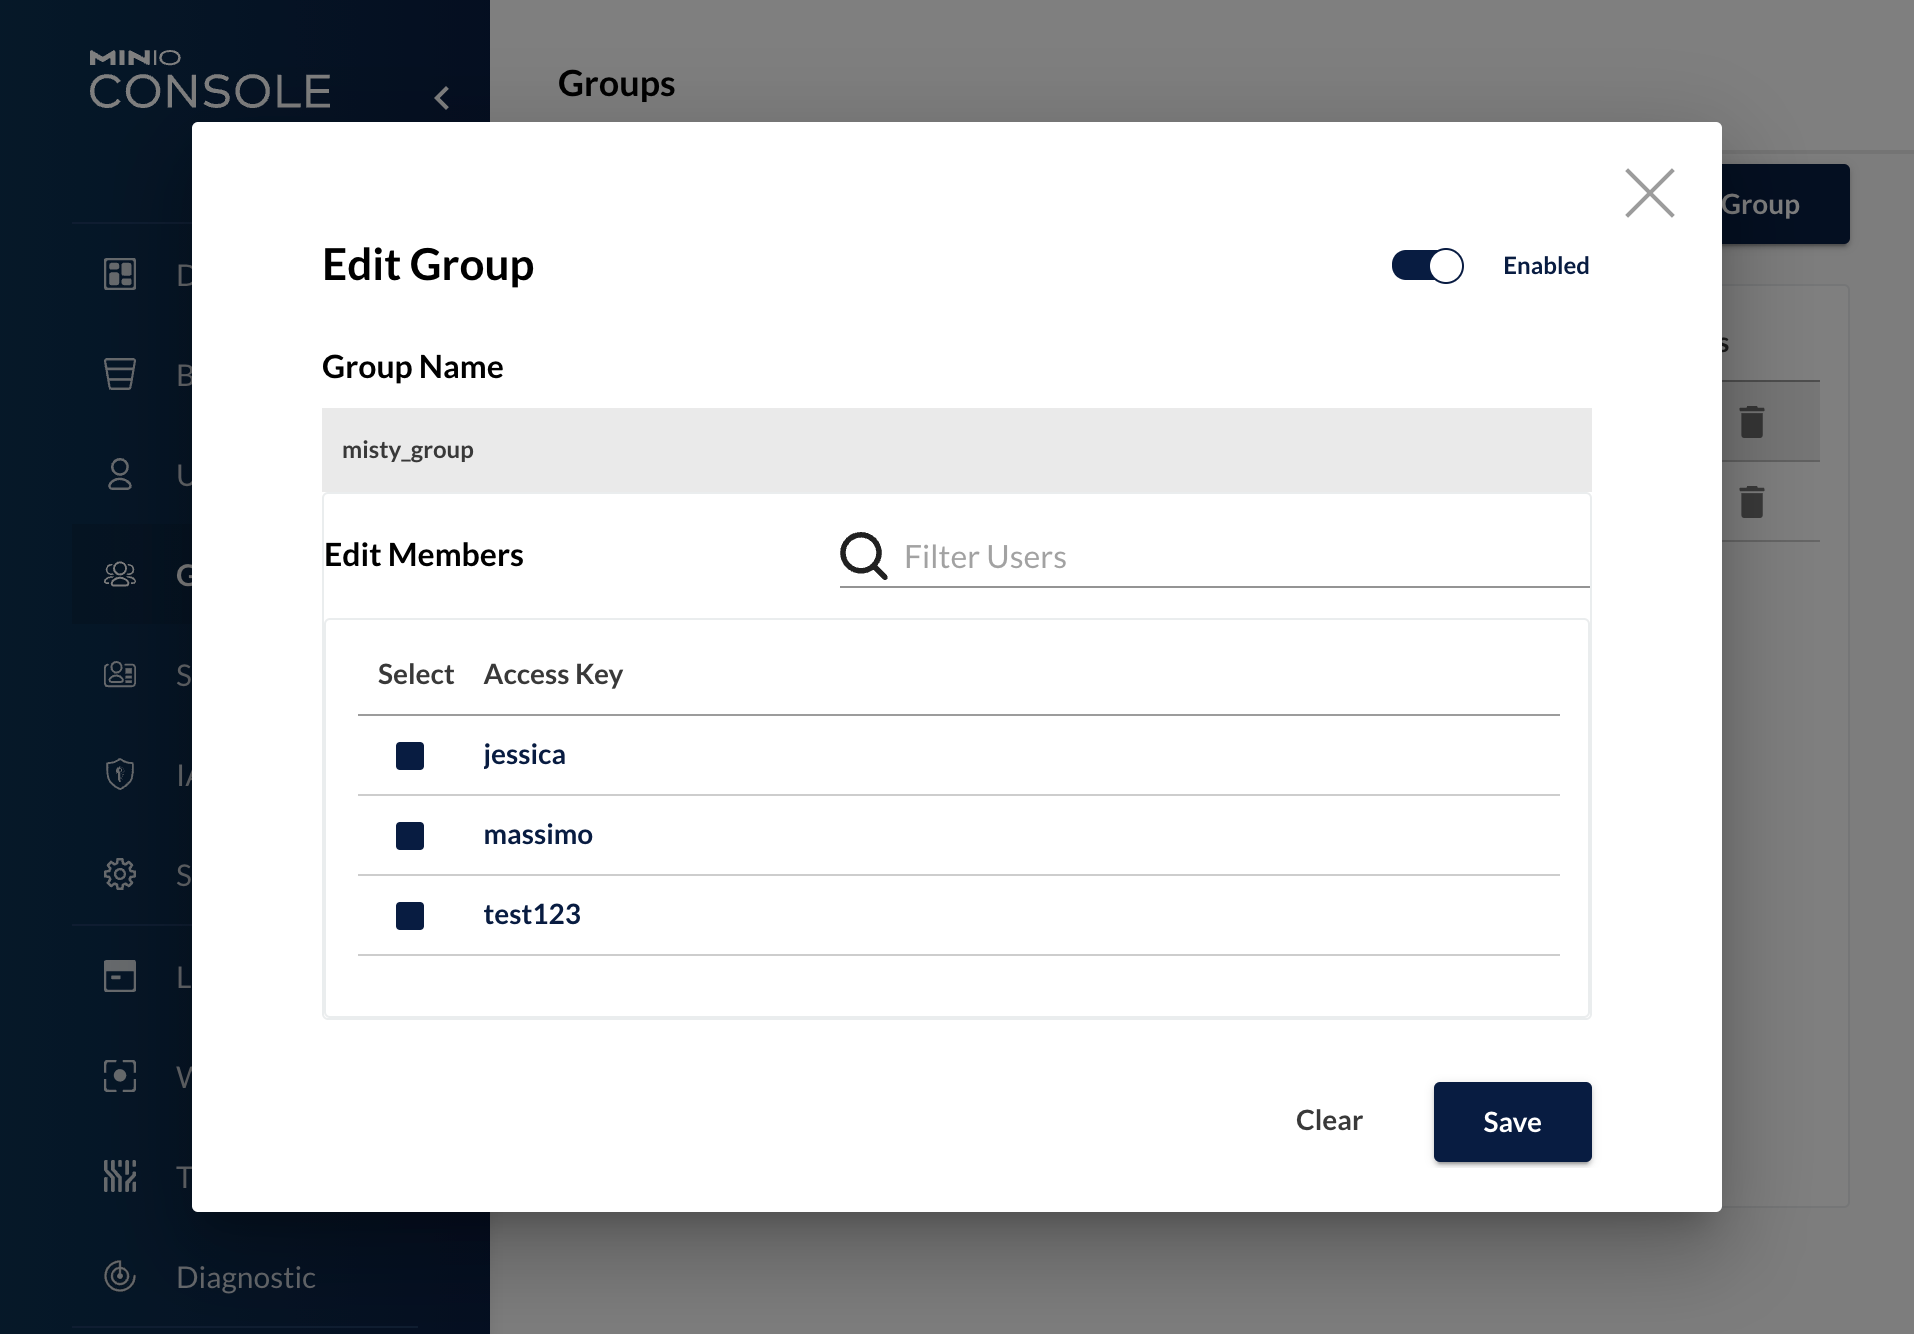
Add user to group
To add a user to a group, simply enter the group page and select the new user. It will be added to the list of those already present
Buckets
Buckets are the basis of every project. Each project can have one or more buckets. In order to access your buckets, your user must be part of a group that has an access policy to the bucket itself.
A bucket is seen as an object that has a string path as its key, and the content of the file as its value. Compared to traditional FTP systems the system works in the same way, but it becomes relevant for obtaining objects saved programmatically via API.
Create a new bucket
To create a new bucket, simply click on the appropriate section in the side menu and then press "Create Bucket" at the top right. The following screen will then appear:
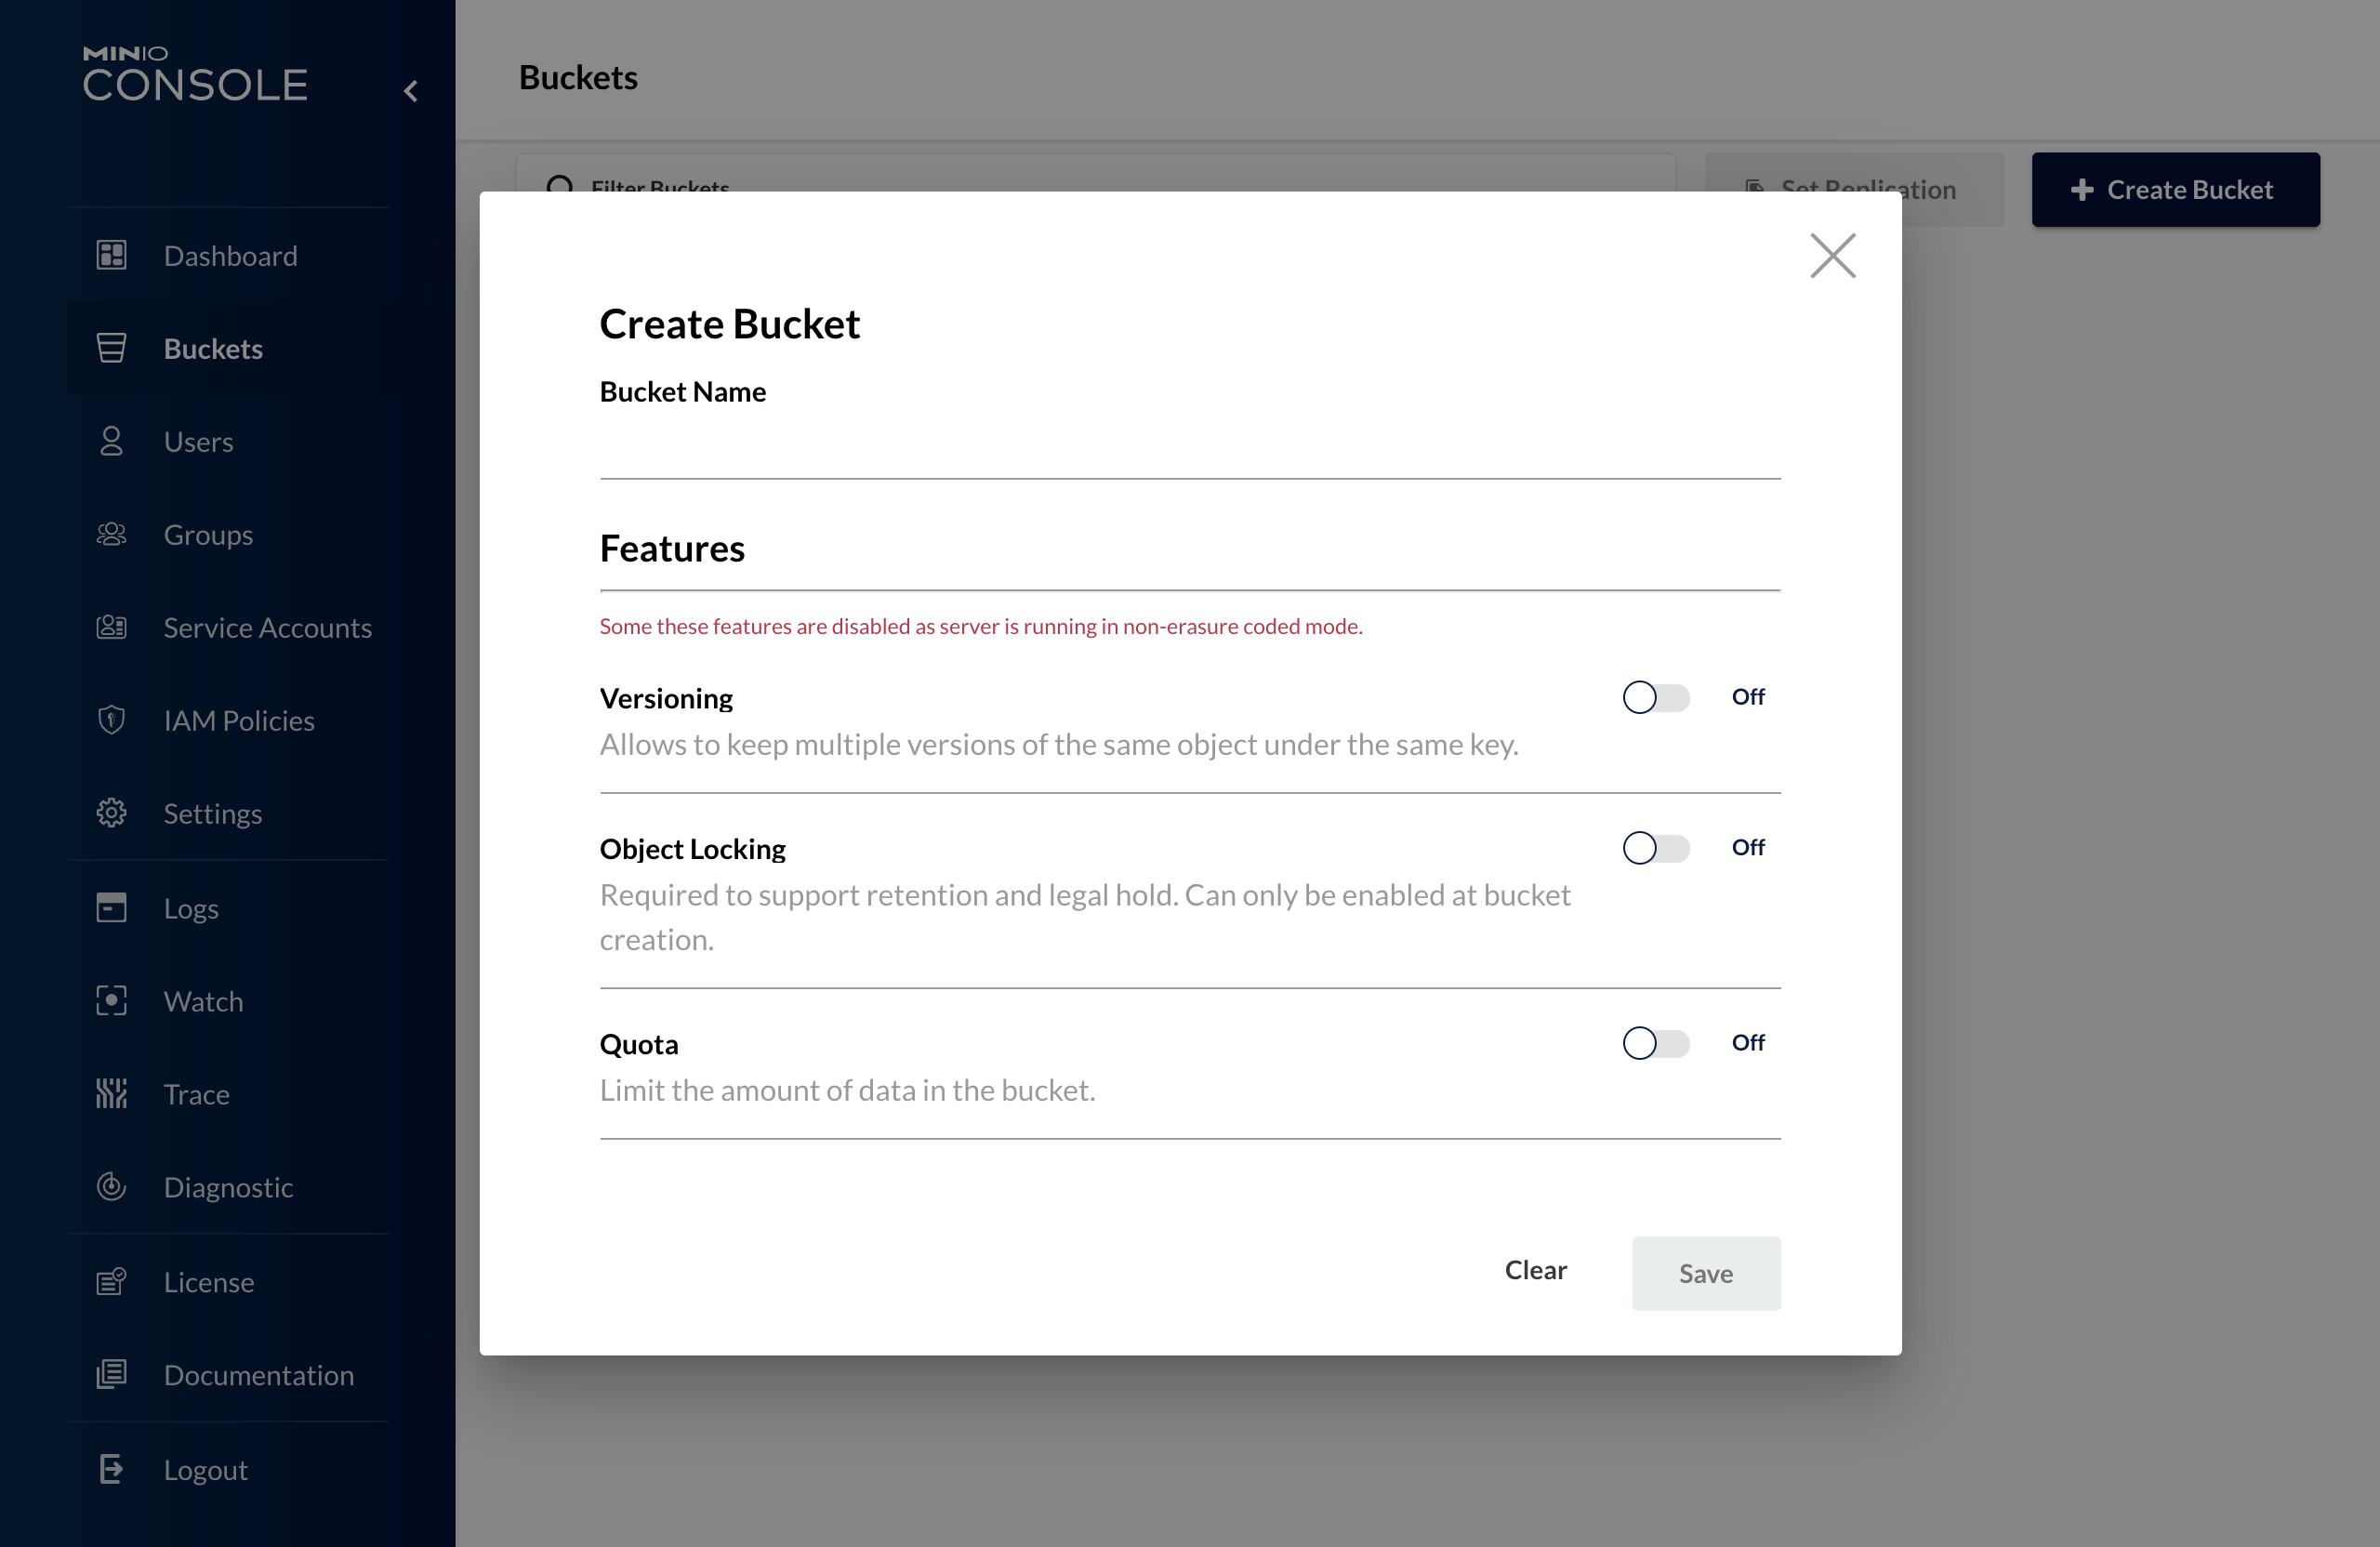
The additional features can be ignored in most cases, but the name is a required parameter to proceed with the creation of the bucket.
As an administrator, it is not recommended to leave users the ability to arbitrarily create buckets to avoid their exponential growth. A recommended procedure is illustrated below. Suppose the project requesting the bucket is called HelpAid:
- Create the bucket by naming it
help_aid(snake case notation is used) - Create the group named
help_aid_groupand add to this group the users who will have permission to operate on the bucket - Create the
help_aid_policypolicy defining the read and write permissions on the bucket - Assign the newly created policy to the
help_aid_groupgroup
In this way all users belonging to the group will have the same permissions and will be able to see only the bucket of their interest
Warning
You cannot write names with spaces
Delete a bucket
To delete the bucket it must be empty. It is therefore necessary to first select and delete all the items in the bucket and then press the red trash can icon that appears in the list of all buckets.
Policy
Access management takes place through the definition of policies. Policies are compatible with the IAM system adopted by AWS. An example of policy is the following:
{
  "Version": "2012-10-17",
  "Statement": [
    {
      "Effect": "Allow",
      "Action": ["s3:*"],
      "Resource": ["arn:aws:s3:::help_aid/*"]
    }
  ]
}
Allows you to see the help_aid bucket, but to edit and operate only on thehelp_aid/test subdirectory
    {
        "Version": "2012-10-17",
        "Statement": [
            {
                "Effect": "Allow",
                "Action":["s3:ListBucket"],
                "Resource": ["arn:aws:s3:::help_aid/*"]
            },
            {
                "Effect": "Allow",
                "Action": ["s3:*"],
                "Resource": ["arn:aws:s3:::help_aid/test*"]
            }
        ]
    }
Allow all actions on the help_aid bucket, except the help_aid/test subfolder:
    {
        "Version": "2012-10-17",
        "Statement": [
            {
                "Effect": "Allow",
                "Action": [
                    "s3:*"
                ],
                "Resource": [
                    "arn:aws:s3:::help_aid/*"
                ]
            },
            {
                "Effect": "Deny",
                "Action": [
                    "s3:*"
                ],
                "Resource": [
                    "arn:aws:s3:::help_aid/test/*"
                ]
            }
        ]
    }
The following policy prevents the deletion of items. Add this statement to an existing group (or create a no-delete group) to prevent users from deleting items:
    {
        "Version": "2012-10-17",
        "Statement": [
            {
                "Effect": "Deny",
                "Action": [
                    "s3:DeleteBucket",
                    "s3:DeleteBucketPolicy",
                    "s3:DeleteObject",
                    "s3:DeleteObjectVersion"
                ],
                "Resource": [
                    "arn:aws:s3:::*"
                ]
            }
        ]
    }